A used excavator can save your operation serious money, or cost you thousands in unexpected repairs. The difference comes down to knowing how to inspect a used excavator before you commit. Whether you’re buying from an auction, a dealer, or an international marketplace, a thorough inspection is the single best way to protect your investment and avoid hidden problems.
At Japan Machinery Trader, we inspect every machine we source from Japanese rental fleets and auction channels before listing it. Our team documents operating hours, structural condition, and mechanical performance so buyers overseas get a clear picture of what they’re purchasing. But we also believe informed buyers make better decisions, and that means understanding the inspection process yourself, whether you’re evaluating one of our machines or shopping from any source worldwide.
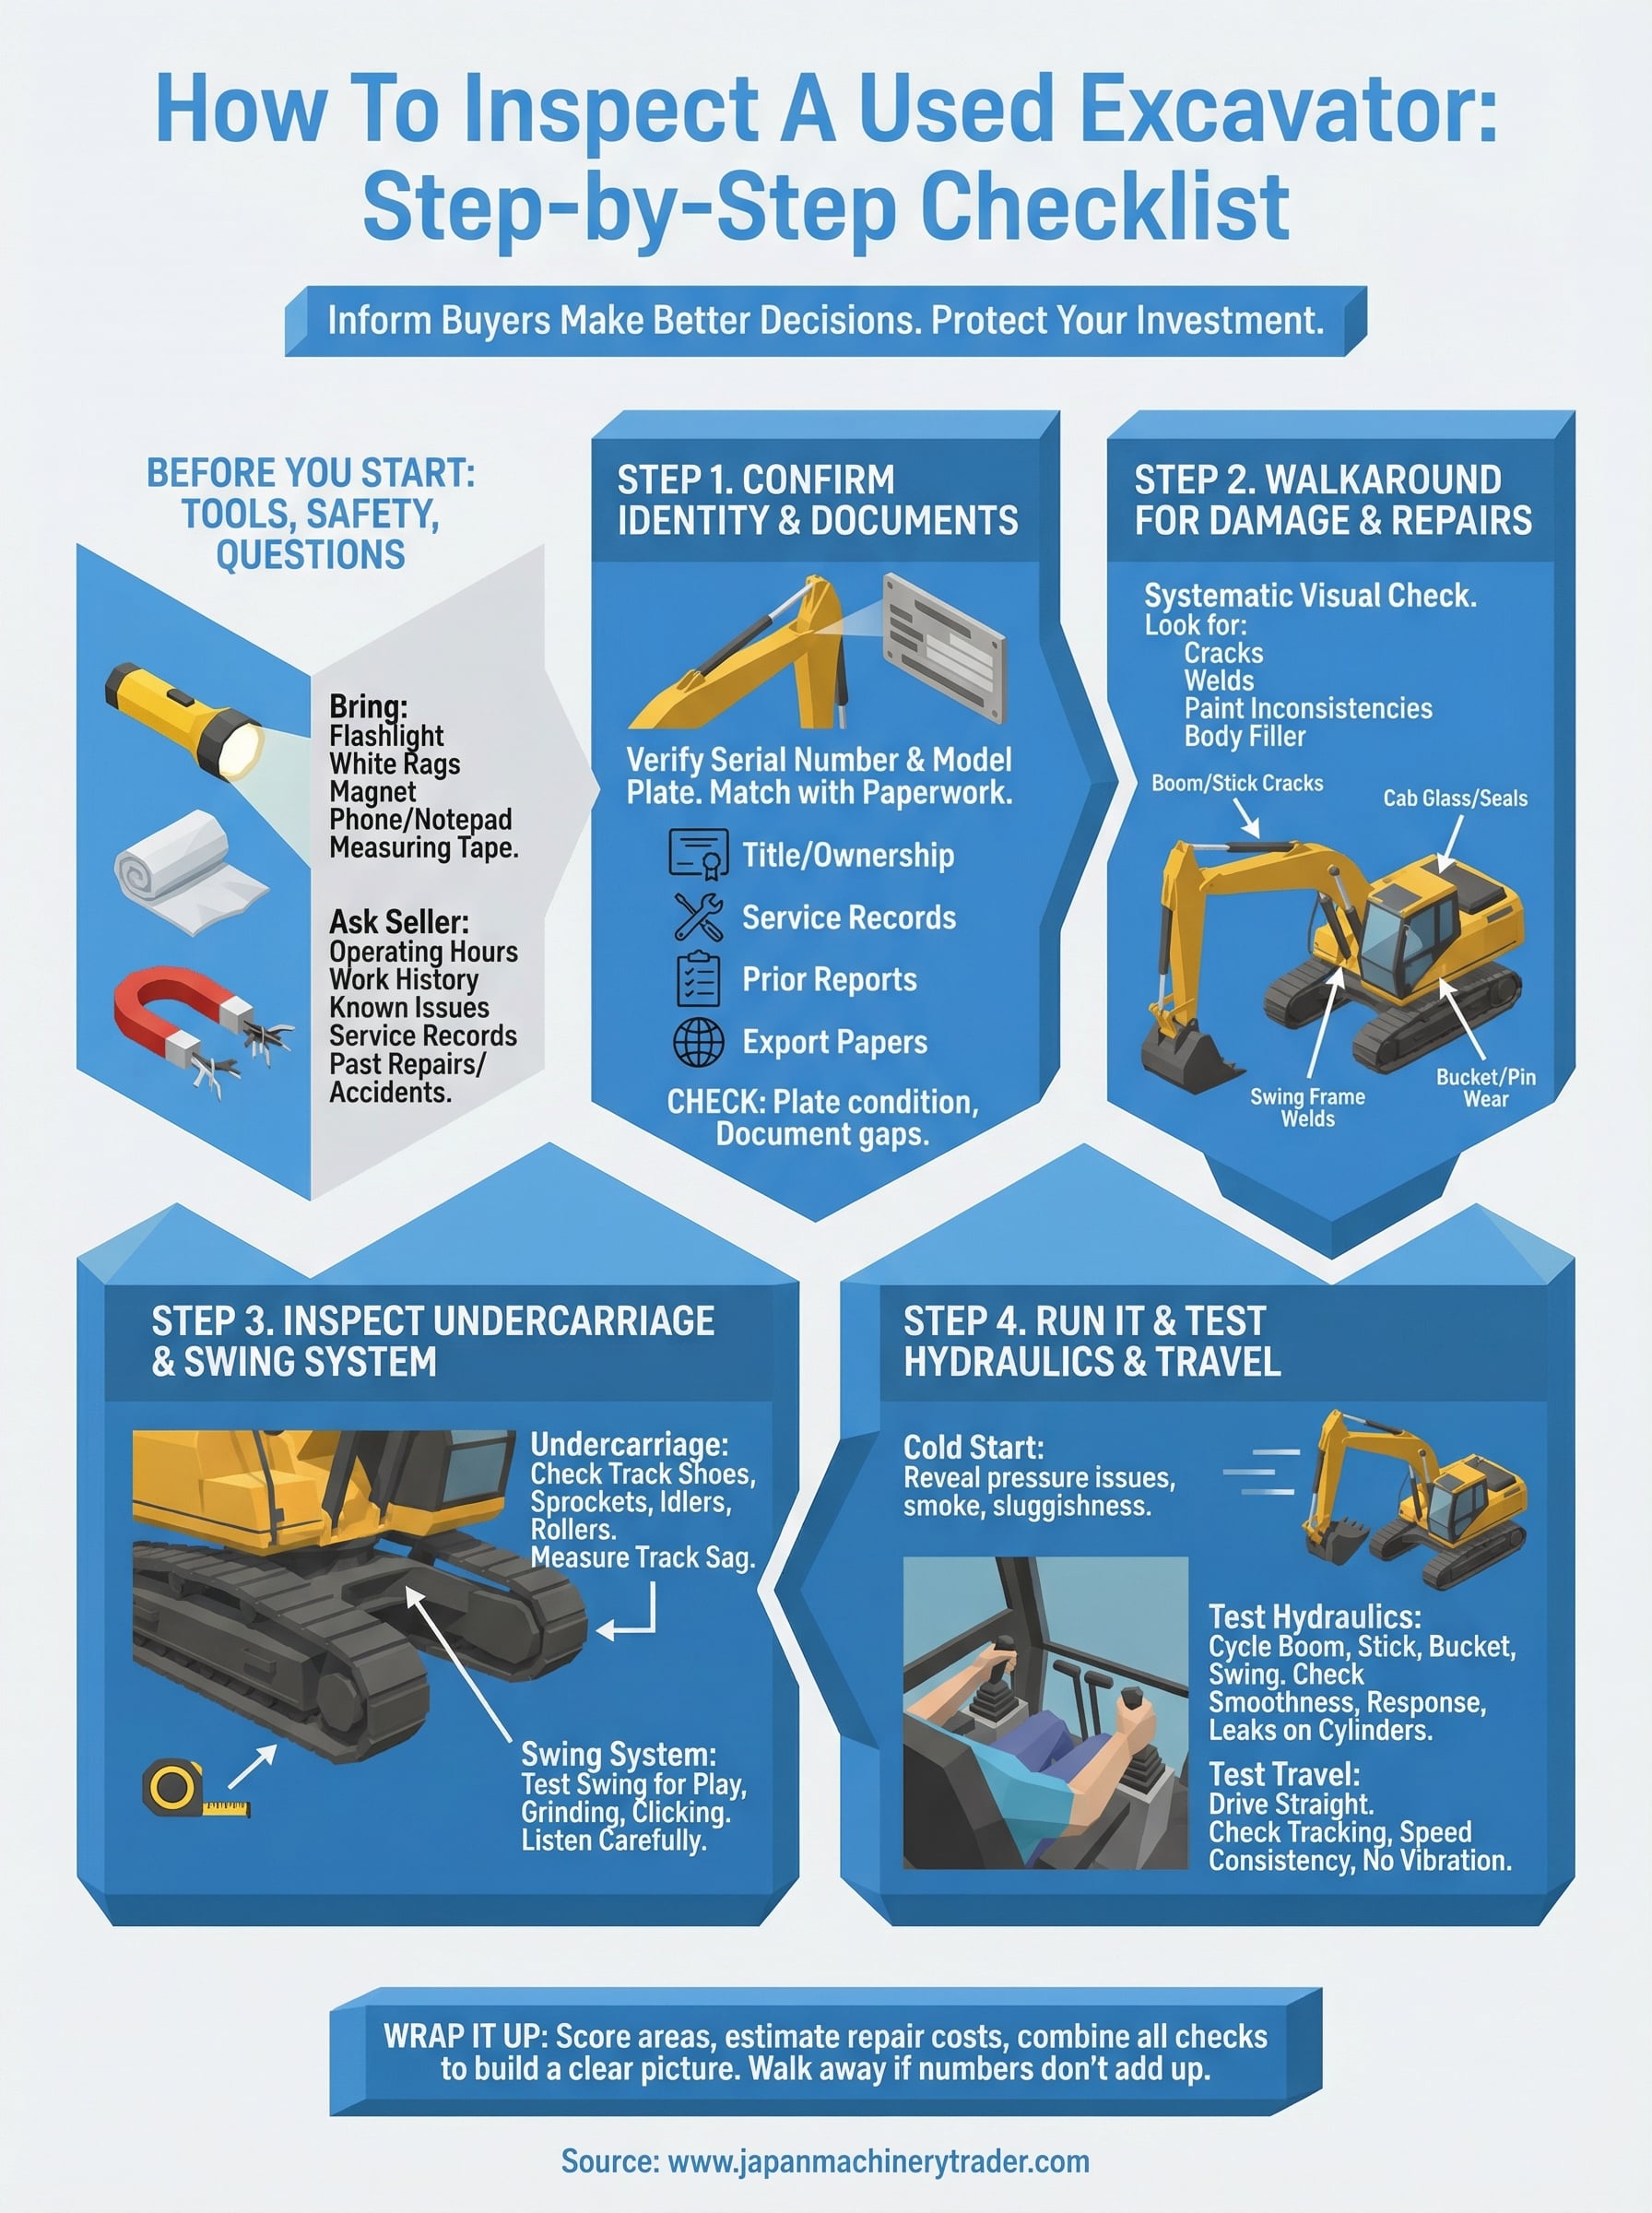
This step-by-step checklist walks you through every critical checkpoint: structural integrity, hydraulics, undercarriage, engine health, cab condition, and documentation. Follow it from top to bottom, and you’ll have the confidence to separate a solid machine from a money pit, before you sign anything.
Before you start: tools, safety, and questions
Showing up to an inspection without the right preparation puts you at a disadvantage before you even look at the machine. A few minutes of planning before you arrive will make every step of how to inspect a used excavator faster and more reliable. You want to control the process, not just react to what the seller puts in front of you.
What to bring
Bring the right gear so you can check every area thoroughly. A bright flashlight lets you see inside the engine bay, underneath the cab, and deep into the undercarriage without relying on natural light. A white rag is one of the most useful tools you can carry: wipe it along hydraulic cylinders and around fittings to spot oil leaks immediately.
Bring a magnet too. Run it along the boom and side panels to detect body filler, which sellers sometimes use to hide repaired cracks or collision damage.
Here is a quick checklist of what to bring:
- Flashlight
- White rags
- Magnet
- Phone or notepad for photos and notes
- Measuring tape (useful for checking undercarriage wear)
What to ask the seller before you touch anything
Before the physical walkthrough starts, ask direct questions about the machine’s working history. Find out how many operating hours it has, what type of work it was used for, and whether it has any known mechanical problems. Service records and maintenance logs are worth requesting, especially if the machine came from a rental fleet, where scheduled servicing is more likely to have been documented.
Also confirm whether the machine has had any structural repairs or been involved in any accidents. A seller who gives vague or evasive answers on these points is a red flag you should weigh carefully before you invest more time in the inspection.
Step 1. Confirm machine identity and documents
Before you check a single hydraulic line, verify that the machine in front of you is exactly what the seller claims it is. Serial numbers and model information are your starting point for how to inspect a used excavator properly. Cross-reference the serial number on the machine frame against the title, registration, or export documentation to confirm they match.
Check the serial number and model plate
Locate the manufacturer’s identification plate, which is typically mounted on the boom, upper frame, or inside the cab door. Write down the serial number and verify it against the paperwork the seller provides. Any discrepancy between the plate and the documents is an immediate red flag that could indicate a stolen machine or tampered records.
If the serial number plate looks scratched, re-stamped, or poorly fitted, walk away until the seller provides a clear and verifiable explanation.
Documents to collect and review
Request these items before you move any further into the inspection:
| Document | Why It Matters |
|---|---|
| Title or ownership certificate | Confirms legal ownership |
| Service and maintenance records | Shows how the machine was maintained |
| Prior inspection reports | Reveals known issues or past repairs |
| Export or import clearance papers | Required for international transactions |
Gaps in the paperwork increase your risk, even if the machine looks clean on the outside.
Step 2. Do a walkaround for damage and repairs
Walk around the entire machine slowly and systematically before you touch anything mechanical. This step of how to inspect a used excavator is about spotting visible evidence of past damage, poor repairs, or deferred maintenance that sellers often downplay or fail to disclose upfront.
Look for cracks, welds, and paint inconsistencies
Start at the boom and stick, then work your way to the upper frame and counterweight. Fresh welds or inconsistent paint in localized areas almost always point to a repair that was made at some point. Run your magnet along flat structural panels to detect body filler that could be concealing cracks underneath the surface.
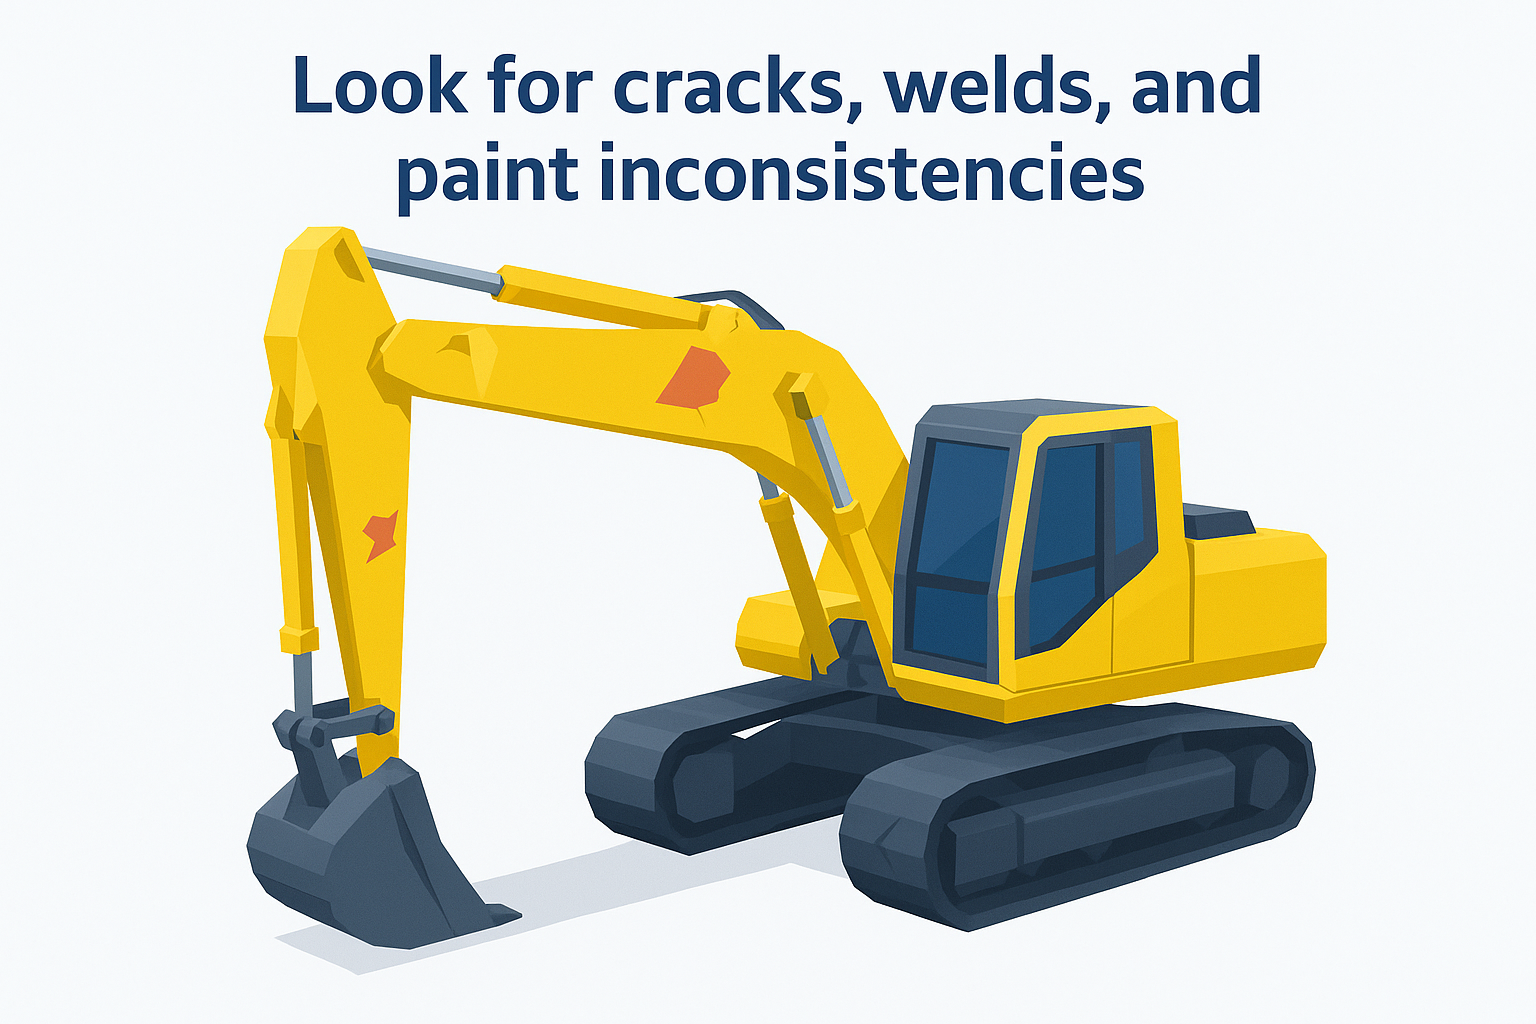
If you find filler or a fresh weld on a high-stress area like the boom root or the swing frame, treat it as a serious structural concern until a qualified technician confirms it is sound.
Check the cab glass, door seals, and cab frame for bends or misalignment that could indicate a past rollover or tip incident. Examine the bucket, teeth, and linkage pins for excessive wear. Bent pins or elongated pin holes tell you the machine worked hard and may need immediate replacement parts before returning to active service.
Step 3. Inspect undercarriage and swing system
The undercarriage is the most expensive single system to rebuild on any excavator, and swing bearing replacement can cost as much as a significant portion of the machine’s resale value. Knowing how to inspect a used excavator’s undercarriage and swing components will tell you more about its remaining service life than almost any other check on this list.
Check track wear and rollers
Walk both sides of the machine and examine the track shoes, sprockets, idlers, and bottom rollers for visible wear patterns. Measure the track sag by checking the gap between the upper run of the track and the carrier roller. A gap greater than 25-40mm typically indicates the tracks need tensioning or replacement soon.

Uneven wear across the rollers often signals the machine spent significant time working on sloped ground, which accelerates wear on one side faster than the other.
Test the swing bearing
Sit in the cab and swing the upper structure slowly in both directions while a second person stands safely outside and watches the slew ring for any visible play or rocking. You should also listen for grinding, clicking, or hesitation as the machine rotates, which points to worn gear teeth or a failing bearing that needs immediate attention.
Step 4. Run it and test hydraulics and travel
Starting the machine cold gives you the most honest view of its real condition. A cold start reveals oil pressure problems, excessive smoke, and sluggish hydraulics that disappear once the engine warms up. This is the most critical live test in how to inspect a used excavator, so watch and listen carefully from the moment the key turns.
Check hydraulic response and leaks
Once the machine warms up for five minutes, cycle every hydraulic function: boom up and down, stick in and out, bucket curl, and swing. Each movement should feel smooth and respond immediately to your inputs. Hesitation, jerking, or slow response points to worn pumps, low fluid, or failing control valves that will cost you real money to fix.
Watch the hydraulic cylinders closely while you cycle them. Oil seeping past the seals leaves a visible wet streak on the chrome rod surface.
Test travel and straight-line tracking
Drive the machine forward and backward in a straight line on flat ground. A properly functioning excavator should track straight without pulling to one side. Drifting or uneven travel speed between the two tracks points to worn motors or a hydraulic imbalance that repairs do not fix cheaply. Run through this quick checklist while the machine moves:
- Pedals and levers respond without excessive play
- Travel speed feels consistent in both directions
- No unusual vibration comes through the cab floor
Wrap it up and decide what to do next
Following this checklist gives you a structured, repeatable process to evaluate any machine with confidence. Documents, structural condition, undercarriage wear, and live hydraulic performance each tell you something the asking price does not. When you combine all four checkpoints, you build a clear picture of what you’re actually buying, not just what the seller describes.
Once you’ve completed how to inspect a used excavator, score each area and total the estimated repair costs before you make any offer. A machine with minor cosmetic issues is often a fair deal, but a machine with undercarriage problems, hydraulic leaks, and missing paperwork is rarely worth the risk at any price. Walk away if the numbers do not add up.
Sourcing from a marketplace that already does this work removes much of that pressure. Browse inspected used excavators sourced directly from Japan and review condition reports, operating hours, and full specifications before you commit to a purchase.